Step by Step | OS Map | Downloads | Gallery | Fly through

Our last five walks have been categorised as easy – a good idea when the days are short, and the weather may be poor. Spring is here now though, and the length of the daylight is much less of an issue: So, we scheduled a longer walk at Brougham near Penrith.
In order to justify such a long drive, the walk needs to deliver lots of interest and our walk leader really has delivered on this one. We have the Countess Pillar on the Lady Anne Way, the site of a Roman camp, the remains of Brocavum fort, Brougham Castle, an outdoor swimming pool, an old mill, a Tudor road bridge, a henge, the Eden Millenium monument, King Arthur’s Round Table (another henge) , the entrance to the Lowther Bridge estate, Brougham Hall, the village where the last battle on English soil took place, a partially restored Pele tower, and a church where the body of St Cuthbert rested, and more.
Step-by-Step
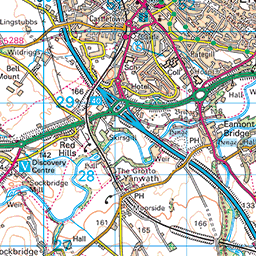
We start from a layby where the B6262 leaves the A66. If you are heading here from the South, then take the M6 north to junction 40 at Penrith then follow signs for A66 (East), keep following the signage through the next roundabout, then as you cross the river look for the Brougham Castle tourist sign indicating a filter lane on the right. This takes you onto the B6262, with a convenient layby right next to the A66, or if that is in use, ample roadside parking on the road down to Brougham Castle.
The layby is at OS grid reference NY54252897, which corresponds to the What-3-Words tag trinkets.timeless.cool If you are using Satnav to get there then try searching for Brougham Castle, or Moor Ln, Penrith CA10 2AA.

It’s tempting to head straight down to the castle, but before we do that, our first point of interest takes us back toward the A66 and then along the quiet lane adjacent to it – this was once the main road, and you will see cat’s eyes remaining from that time. If you glance over the busy A66 just as the lane begins you will see the site of a Roman Encampment. It was standard practice for civilians associated with the service of Roman military forts to live in adjacent villages referred to as a vicus, and the site to the north of the A66 was the vicus for the Brocavum Roman fort which we will see soon enough.
During 2008, a pipeline from Hackthorpe to Penrith was constructed, and as part of these works, archaeological investigation of the vicus were funded. These backed up earlier digs in the 1960’s which revealed a cemetery. Analysis of the minerals present in bone enabled archaeologists to show that the vicus was populated with people originating from eastern Europe – probably Danubians.

We continue down the lane adjacent to the A66 for 200m until we find the Countess Pillar, erected by Lady Anne Clifford in 1656 to mark the place where she said goodbye to her mother, Margaret Clifford, Countess of Cumberland for the last time.
Anne Clifford, Countess of Pembroke, Dorset and Montgomery (1590–1676), spent much of her life in a long and complex legal battle to obtain the rights of her inheritance, and her mother was one of the few who supported Anne’s claim to the family estates. In 1616 Anne travelled north to see her estates and visit her mother at Brougham Castle. On her departure from the castle, Anne travelled with her mother a quarter of a mile to where the castle drive meets the main road, where they left each other for the last time – Margaret died a month later.
The inscription on the pillar describes Anne as “Sole Heire” of her father, George Earl of Cumberland. It also refers to a bequest in memory of Margaret which was made to the poor of the parish of Brougham. This is commemorated annually on 2nd April.
We have encountered the name Lady Anne Clifford a number of times of Bentham Footpath Group walks; there is an excellent long distance path, the Lady Anne’s way which takes in many of the sites she fought to inherit between Skipton and Penrith, so we have used parts of the route a number of time – for example on our Mallerstang walk.
At the top of the Pillar is a square “clockface” where the clocks are sundials. As well as the usual single finger design of sundial, there are unusual variants on the east and west faces where the length of the shadow rather than its angle is used to indicate the time. We now head back to the layby where we started, and then continue down the B6262 toward Brougham Castle, soon arriving at the crossroads where the road to the castle meets the road we are parked on.


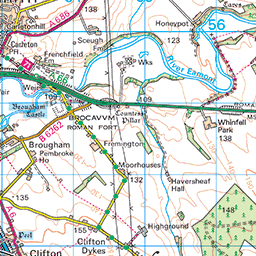
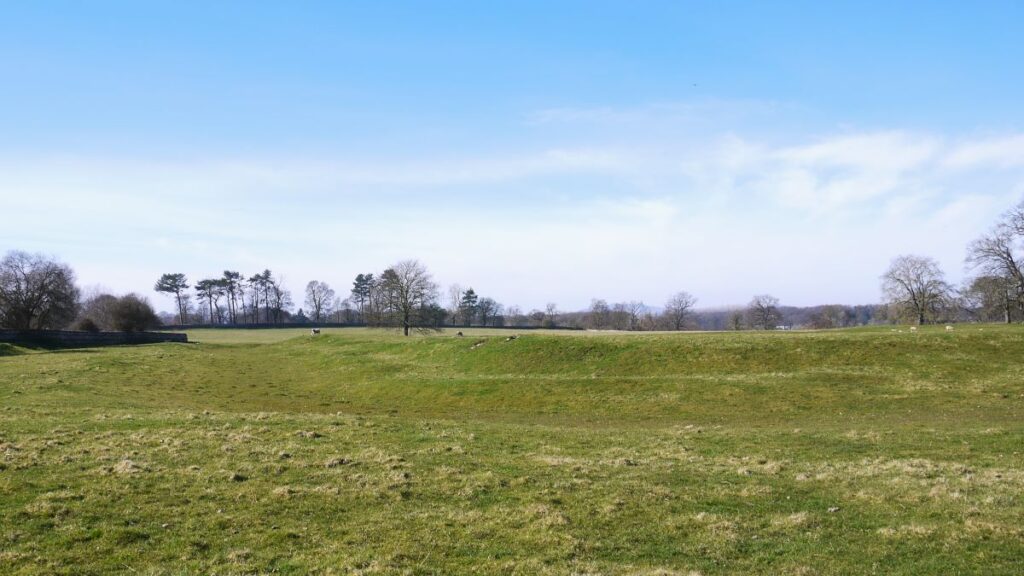
It is worth pausing here and looking at the field adjacent to the castle. At first it looks empty, but we soon discern the remains of earthworks which mark the site of the Roman fort at Brocavum. Somewhat surprisingly this has never been excavated in as organised a manner as the vicus so relatively little is known about it. It seems somewhat strange that a known Roman fort should sit next to a later castle managed by English Heritage with so little information. What we do know is that the fort was 540 ft. by 360 ft. covering over 3.4 acres. There are visible ditches on all sides and the line of the fort walls can still be seen, except in the north, where they were destroyed by a 17th century garden. The positions of the west and east gates are just visible as tracks across the fort.
To find out more, click . . .
Finds indicated that the fort was occupied from the 2nd to the 4th century and was built from local stone – probably re-used in the construction of the later castle. The construction is typical for the forts associated with the emperor Hadrian and the eponymous wall, and it is thought that under the stone fort was an earlier 1st century turf and timber building probably dating to around 80 AD – the Romans arrived in Britain in 43 AD. The function of Brocavum was to defend the river crossing necessary to maintain contact with the fort built at Carlisle in 72 to 73 AD.
What would have been the northern ditch of Brocavum became the southern moat of Brougham Castle – and it is to the castle that we head next.
For more detail about the castle than we can give here, click . . .
The castle was founded by Robert I de Vieuxpont in the early 13th century – for many of the same strategic reasons as the Roman fort – the confluence of the Eamont and Lowther rivers.

In its earliest form, the castle consisted of a stone keep, with an enclosure protected by an earthen bank and a wooden palisade. When the castle was built, Robert de Vieuxpont was one of the only lords in the region who were loyal to King John. The Vieuxponts were a powerful land-owning family in North West England, and also owned the castles of Appleby and Brough. In 1264, Robert de Vieuxpont’s grandson, also named Robert, was declared a traitor, and his property was confiscated by Henry III. Brougham Castle and the other estates were eventually returned to the Vieuxpont family, and stayed in their possession until 1269, when the estates passed to the Clifford family through marriage.

With the outbreak of the Wars of Scottish Independence, in 1296, Brougham became an important military base for Robert Clifford, 1st Baron de Clifford. He began set about strengthening the castle – the wooden outer defences were replaced with stone walls, and a large stone gatehouse was added. The importance of Brougham and Robert Clifford was such that, in 1300, he hosted King Edward I of England at the castle. However, in a twist of fate that mirrored the earlier Vieuxponts, Robert’s son, Roger Clifford, was executed as a traitor, in 1322, and the family estates passed into the possession of King Edward II of England. Once again, the Crown in the form of Edward III eventually returned the castle to the original owner, although it is possible that the driver here was less connected to morality than the costs of maintaining the site in the face of aggressive Scots, because in 1388, the castle was captured and sacked.
Following this, the Clifford’s began spending more time at their other castles, particularly Skipton Castle. Brougham descended through several generations of Cliffords, falling further into disrepair. The castle was briefly restored in the early 17th century, to such an extent, that King James I of England was entertained there in 1617.
In 1643, Lady Anne Clifford inherited the estates, including the castles of Brougham, Appleby, and Brough, and set about restoring them. Brougham Castle was kept in good condition for a while. After Lady Anne’s death in 1676 Thomas Tufton, 6th Earl of Thanet, inherited the Clifford estates, and sold the furnishings. The empty shell was left to decay, soon becoming a ruin. The castle was left to the Ministry of Works, in the 1930s, and is today maintained by its successor, English Heritage.
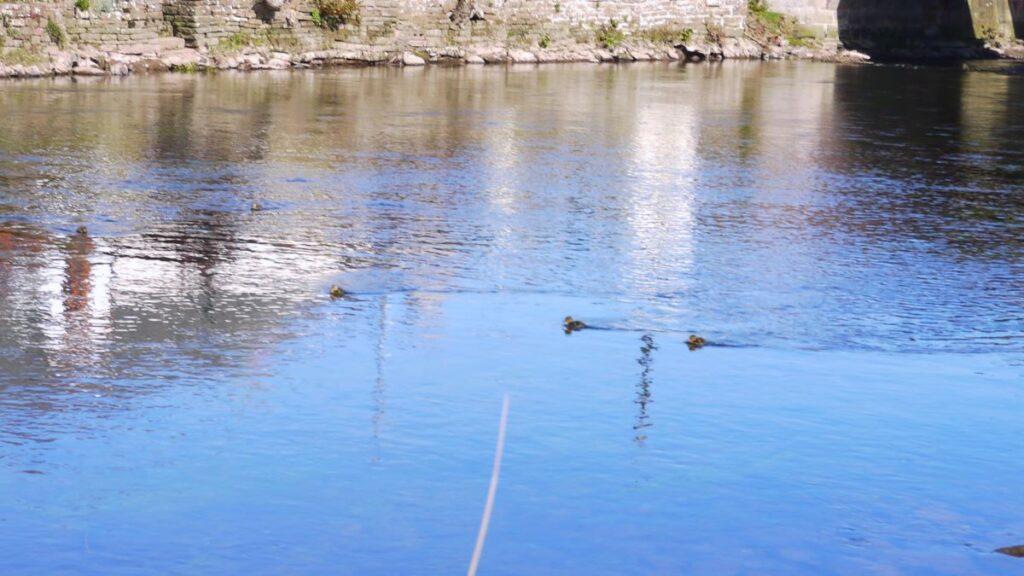
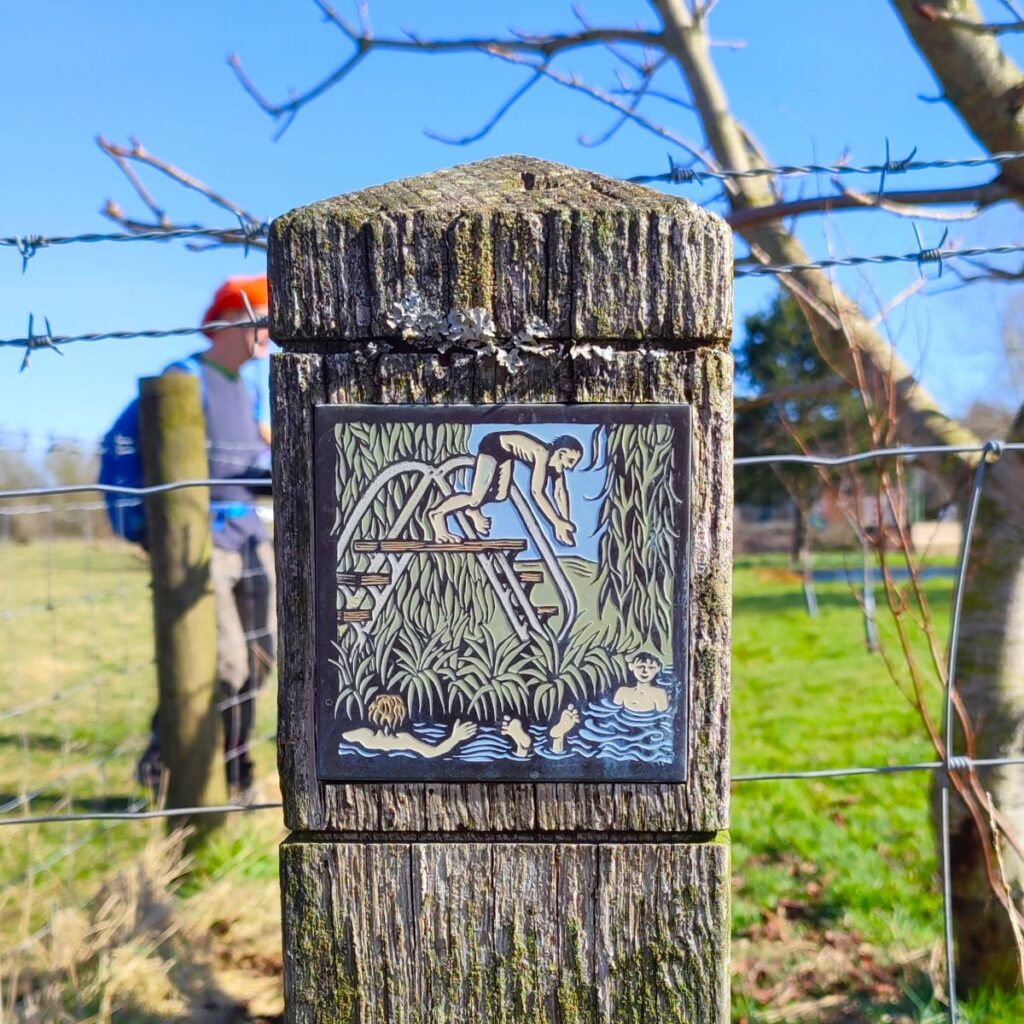
We did not enter the castle, as we had so much else to fit into the day, so press on over the river Eamont following the minor road for about 200m. At that point we see a footpath on the left taking us back toward the river. As we follow this path we see a building to our left – this was once a water powered mill, positioned at the confluence of the Eamont and the Lowther. To the right of the site of the mill and adjacent to our path is an open air swimming pool – now disused – which would once have been fed with water from the river. If you look across the pool diagonally toward the castle, you can see the confluence of the two rivers. Also worth looking for is a ceramic tile marking the pool which was built by the Penrith Swimming Club. Many local people still have fond memories of swimming here on warm summer evenings in the 1950s and 60s.

We stay on the bank of the Eamont for a while now as we follow the river upstream. We initially approach the noisy A66 quite closely but soon meander way to a more tranquil location in front of Carleton Hall – once the family home of the Carleton Family, but now the headquarters of Cumbria Police.
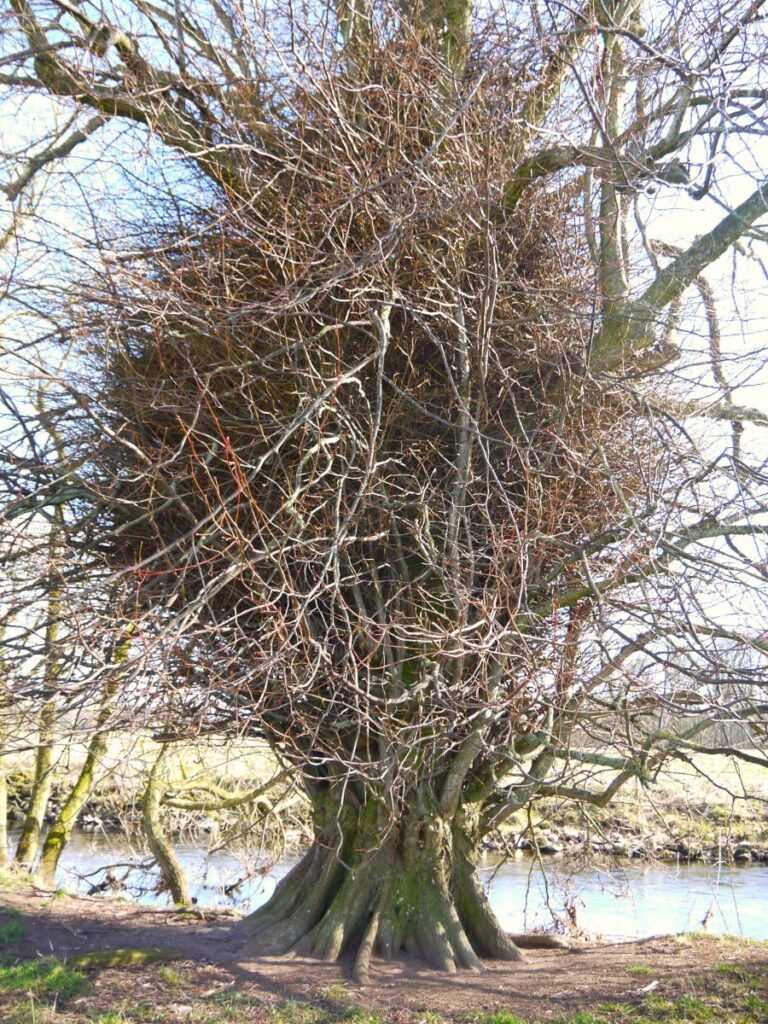
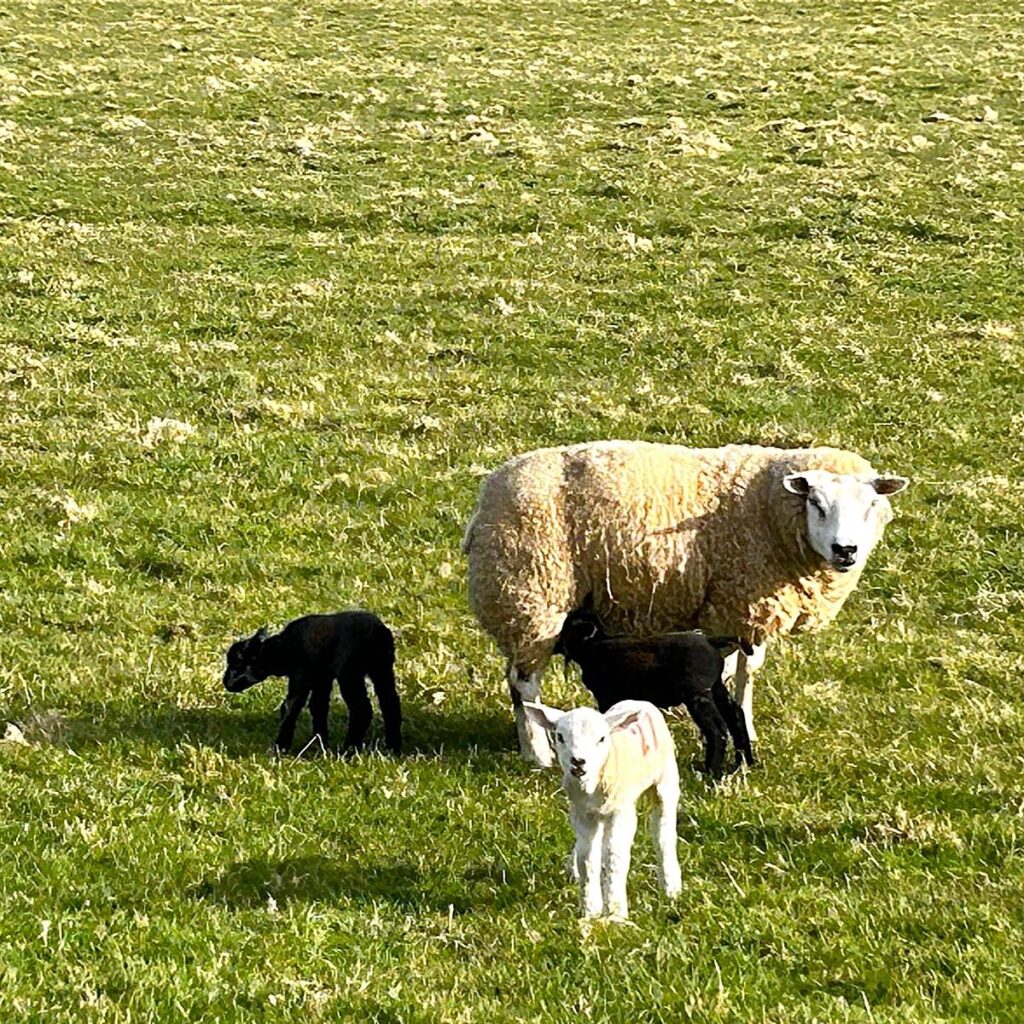
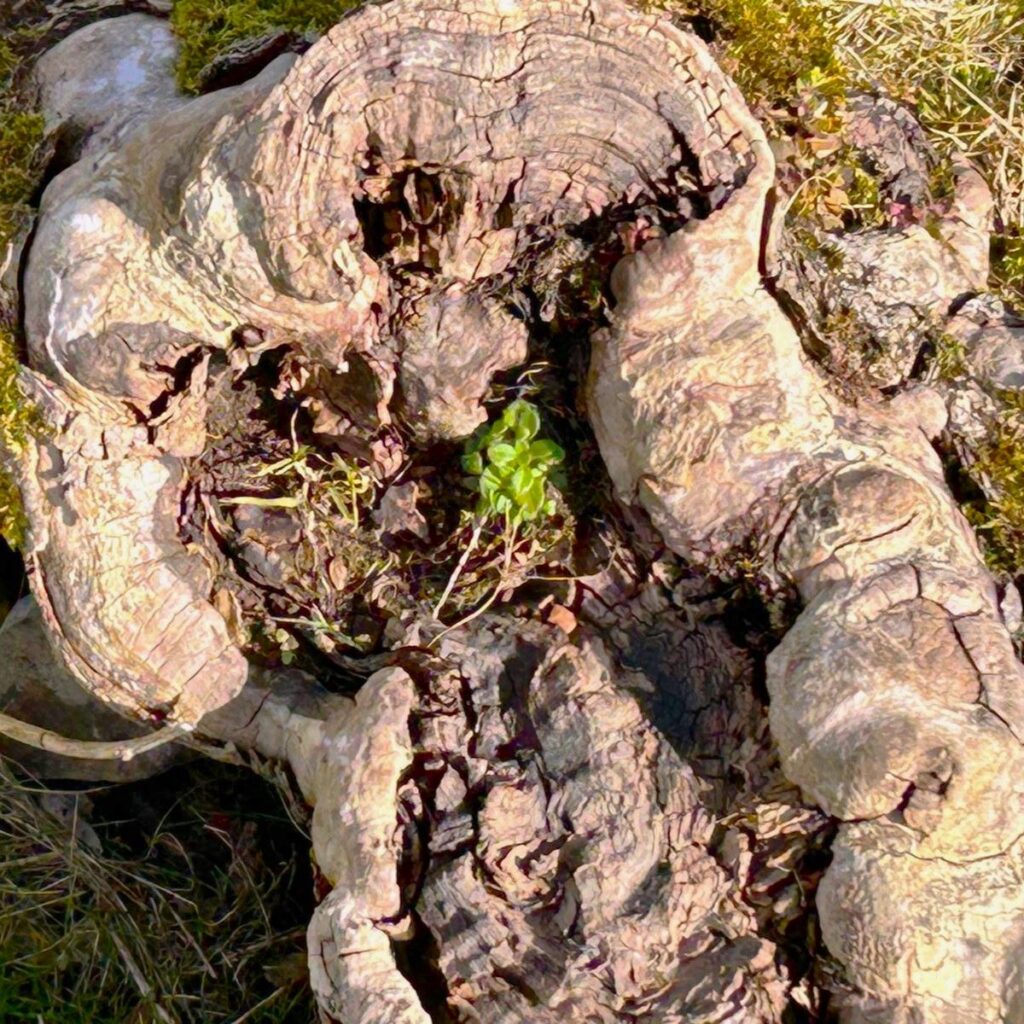
All along the riverbank we find stately elder trees. As a species alder are really useful for stabilising riverbanks as they are tolerant of prolonged immersion during times of flood, and have dense root masses which bind the soil, bringing stability. Their only disadvantage is that they are prone to infestations that trigger “witches brooms” to form – dense mats of poorly controlled spindly growth which are the damaged tree’s attempt to try and contain the problem. Although odd in appearance, witches broom rarely kills an Alder.
We stay with the path next to the river and soon arrive at what was once a footbridge over the Eamont – just beyond this point we enter woodland and follow the path round to a track still alongside the river. The building that we have just skirted here was also a water powered mill at one time, and in front of it is a weir to control water levels, and traces of a spill way into the mill race – now an attractive ornamental feature in the garden.
Ahead of us now is the road bridge over the Eamont – and right next to it is a cast iron footbridge which we take. From here we get a good view of the arches of the older road bridge – the bridge and the village are both called Eamont Bridge.


The bridge, a scheduled monument and a Grade I listed building, crosses the old county boundary between Cumberland and Westmorland and is one of the oldest bridges in the county still in daily use. It was built in 1425 after the Bishop of Durham, offered indulgences (forgiveness for sins, implying easier entrance to heaven) to anyone contributing towards its construction. It remained in use until 1875 when it was widened, and we can still “see the join” – the original structure is made of grey sandstone whilst newer sections are in a redder sandstone, presumably quarried somewhere else.
In December 2015, the bridge was declared unsafe and closed to traffic, following severe flooding caused by Storm Frank. The bridge sustained significant damage, with a one-metre hole reported in a supporting pillar. It was repaired and reopened in March 2016.
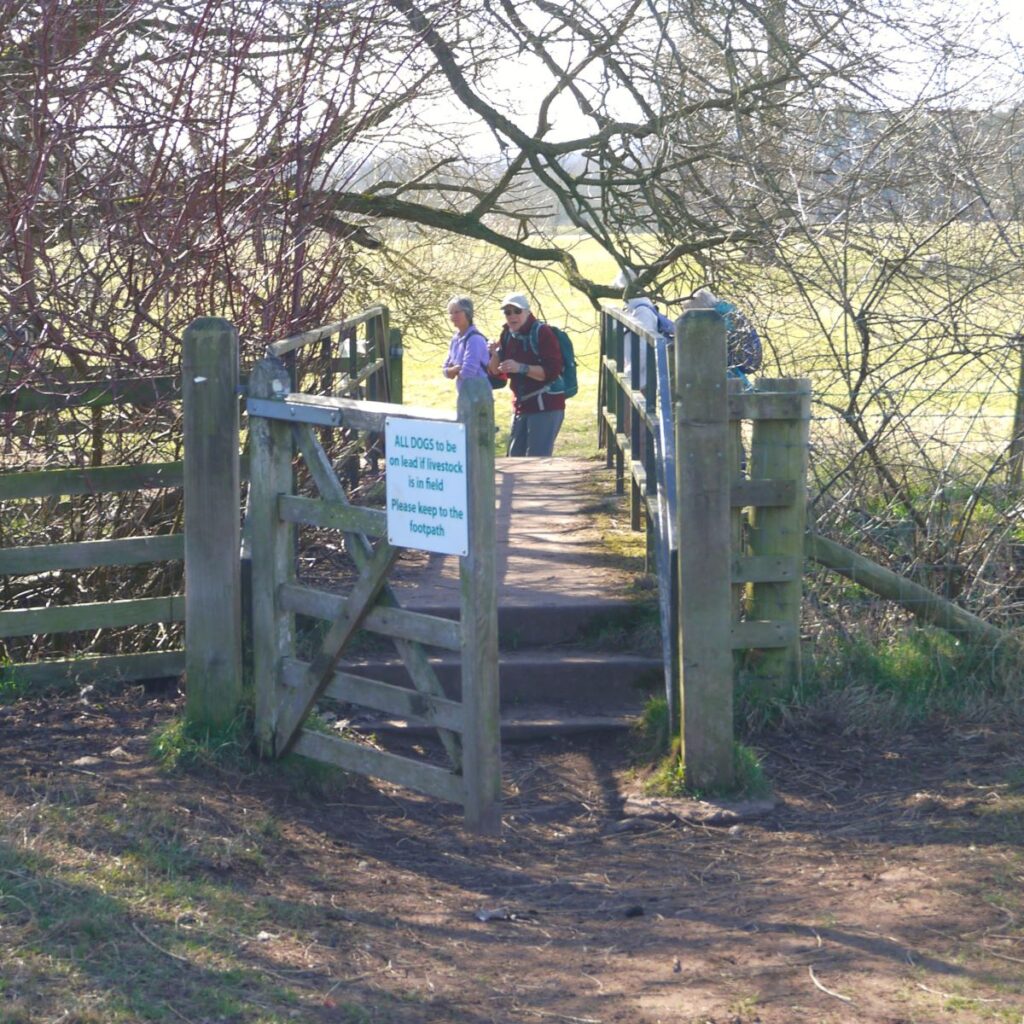
Our route continues along the Eamont, and to achieve this we need to cross the busy A6 and then take the path along the riverside now to the left of the water. We stay on the riverside for about 100m, then arrive at a gate onto a path to the left of woodland. We follow this down to a minor road at the side of the M6 – where the embankment gives us surprisingly good shelter from road noise. We are in Southwaite Green Mill now and we go left along the road here for 100m until we see a fingerpost showing us that we are beside the Mayburgh Henge, managed by English Heritage.
A henge is a prehistoric circular or oval earthen enclosure, dating from around 3000 BC to 2000 BC, so the Neolithic or early Bronze Ages.
There are fewer than 100 henges still surviving across Britain and Ireland, although it’s very likely that there were originally more. The key feature of every henge is a ring-shaped bank on the outside and a ring-shaped ditch on the inside that mark out a central, circular area. Some henges have multiple rings of bank-and-ditch, and some have additional structures (like standing stones or timber posts) within the outer earthwork.
They all have openings, or ‘causeways’ that pass through the earthwork circuits into the central circle, some have two causeways, facing one another across the circle. Henges are typically between 20m and 100m in diameter, but there are a few much larger examples – most notably Durrington Walls and Avebury, both in Wiltshire. The words henge obviously suggests the most famous of all henges -Stonehenge, in Wiltshire. Despite this word association, it is worth noting that the majority of henges do not feature stones.


Mayburgh Henge does feature a single stone at the centre, and it is thought that there were originally seven others accompanying this: three more in the centre, forming a square with the fourth, and two pairs flanking the entrance. The other stones were mapped as standing in the eighteenth century. It is thought that they may have been removed to provide building material for either Penrith Castle or Eamont Bridge, although there is no hard evidence to support this suggestion, and as is often the case where there is no evidence, folklore has stepped up and decreed that the labourers responsible were cursed for their act of desecration, one going mad and another hanging himself.
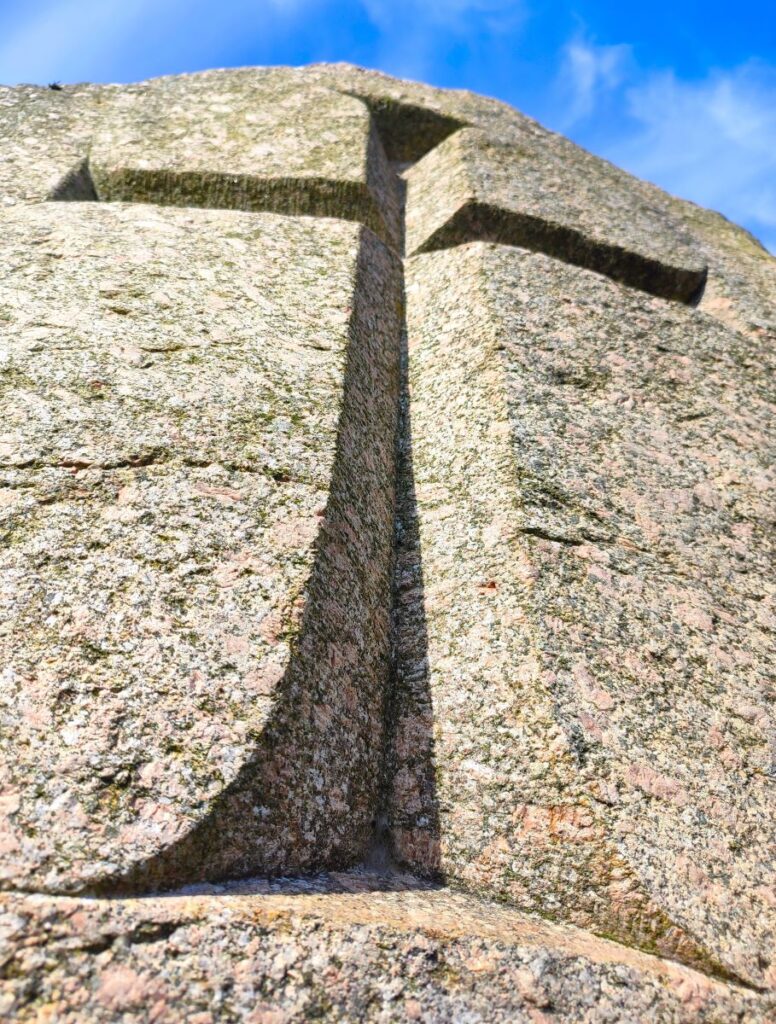
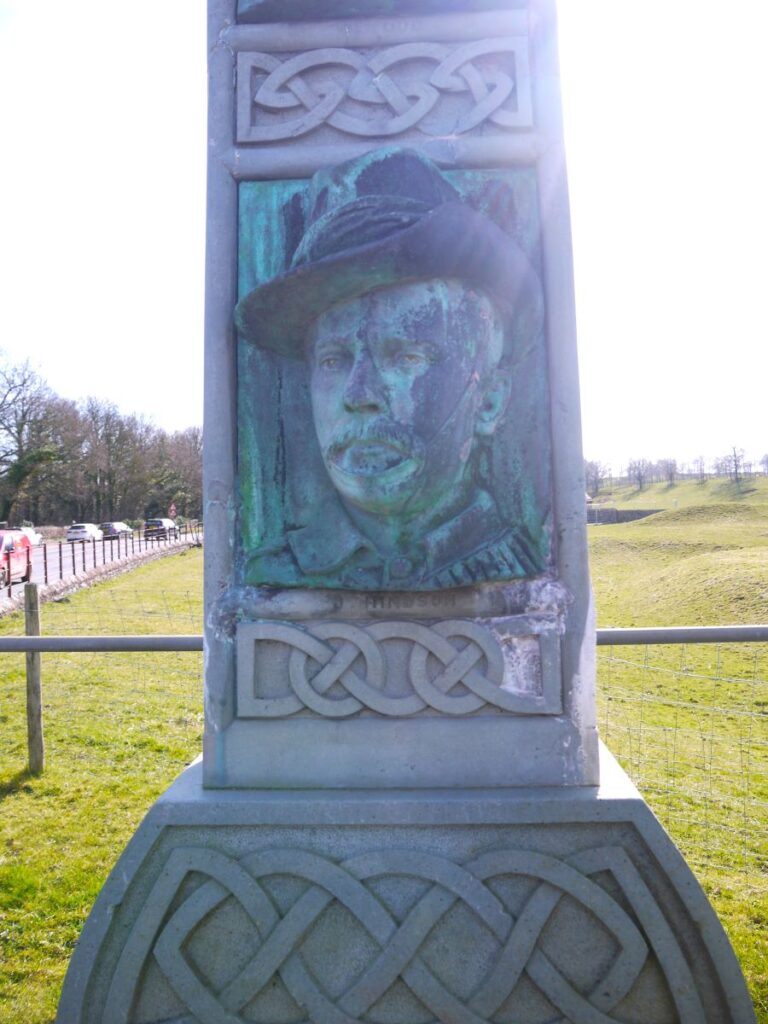
Close to Mayburgh Henge – in fact directly in line with the causeway is a more modern monument installed in 2000 – this is the Eden Millenium Monument. The monument has carved symbols on three sides – Alpha, the first letter of the Greek alphabet on the southwest face, Omega the last letter of the Greek alphabet to the northeast and a Cross to the southeast. The Alpha and the Omega represent the beginning and the end, the past and the future. The Cross and the 2000 inscription represent the present and 2000 years of Christianity. The stone was selected at Shap Quarry by Eden Arts and was transported and erected by Cumbrian Industrials Ltd. The symbols were carved by the Cardozo Kindersley Workshop of Cambridge.
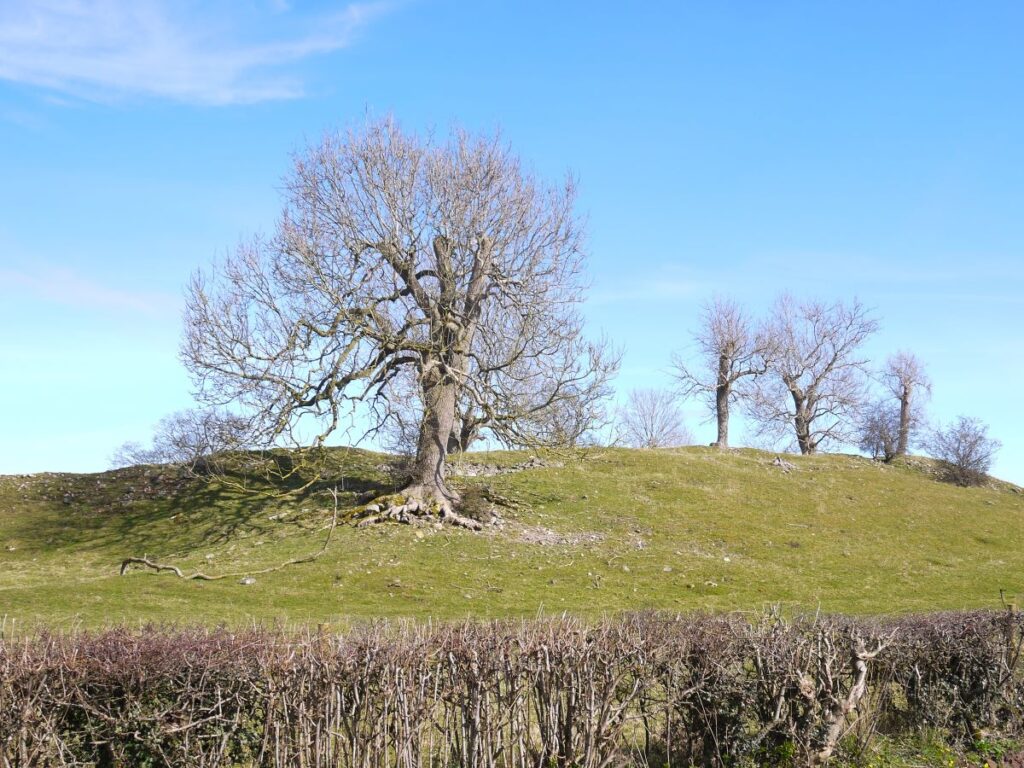
We now have a minor road in front of us – this is the B5320, and we now follow this away from the M6 for just 100m until we see signage for our next henge – “King Arthurs Round Table”. This henge, also in the care of English Heritage and open to the public is slightly smaller than its near neighbour at around 90 metres in diameter. There may have been two original entrances, but only the south-east entrance survives as the northwest entrance has been mostly destroyed by the modern road, and it is known that parts of the henge were “landscaped” in the late 18th to early 19th century, apparently with an intent to use the site as a tea garden. Also present at the junction of the B5320 and the A6 is a war memorial that is unusual in so far as it was built to mark the South African (Boer) war – although memorials to the later wars have been added.
Once at the A6, we head right and walk along the pavement on the left for 120 m – noting the river to our left – the Lowther this time.
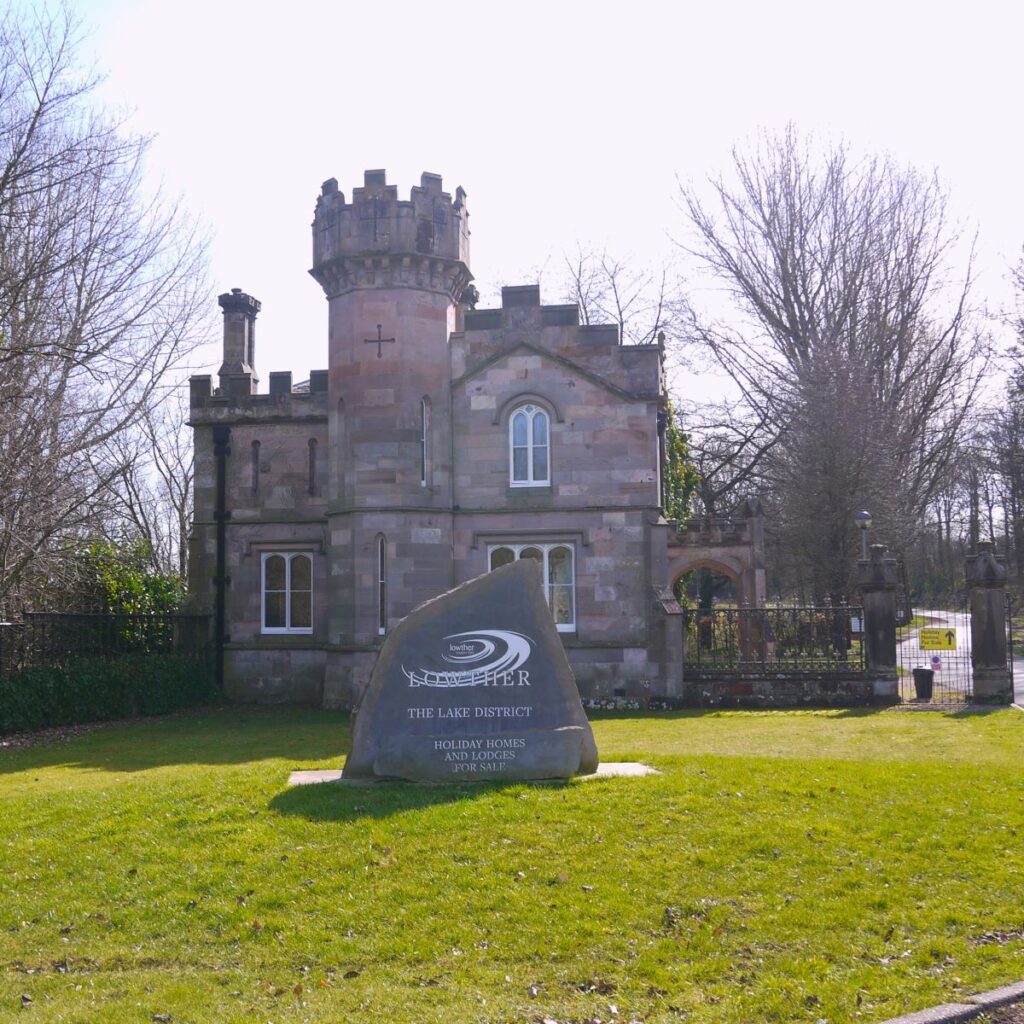
The A6 soon turns sharp left over the river at Lowther bridge, and we notice a rather fine gatehouse on the right hand side of the road. This is one of the entrances to the Lowther Estate – other Bentham Footpath Group walks such as the excellent Askham walk explore that area.
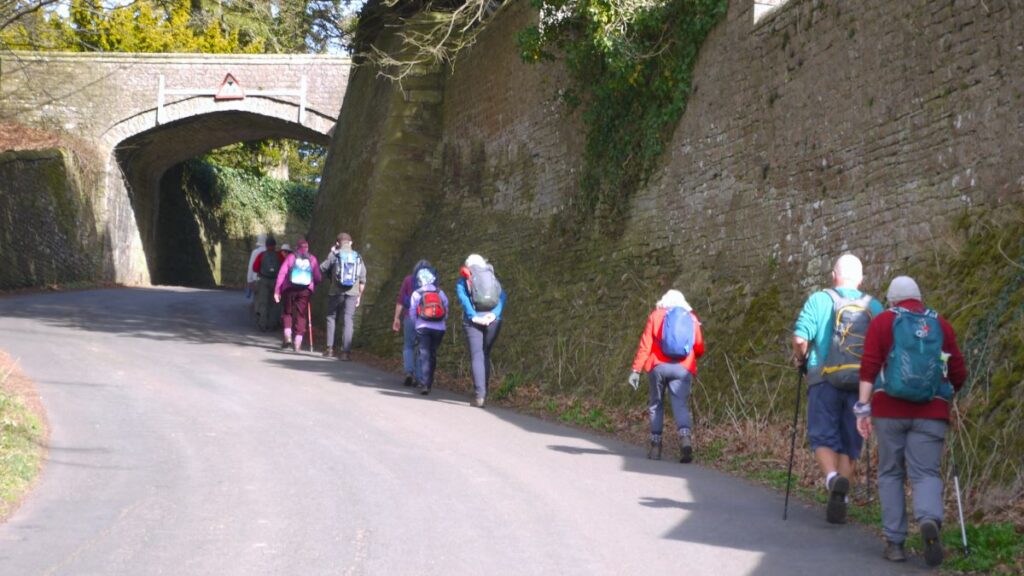
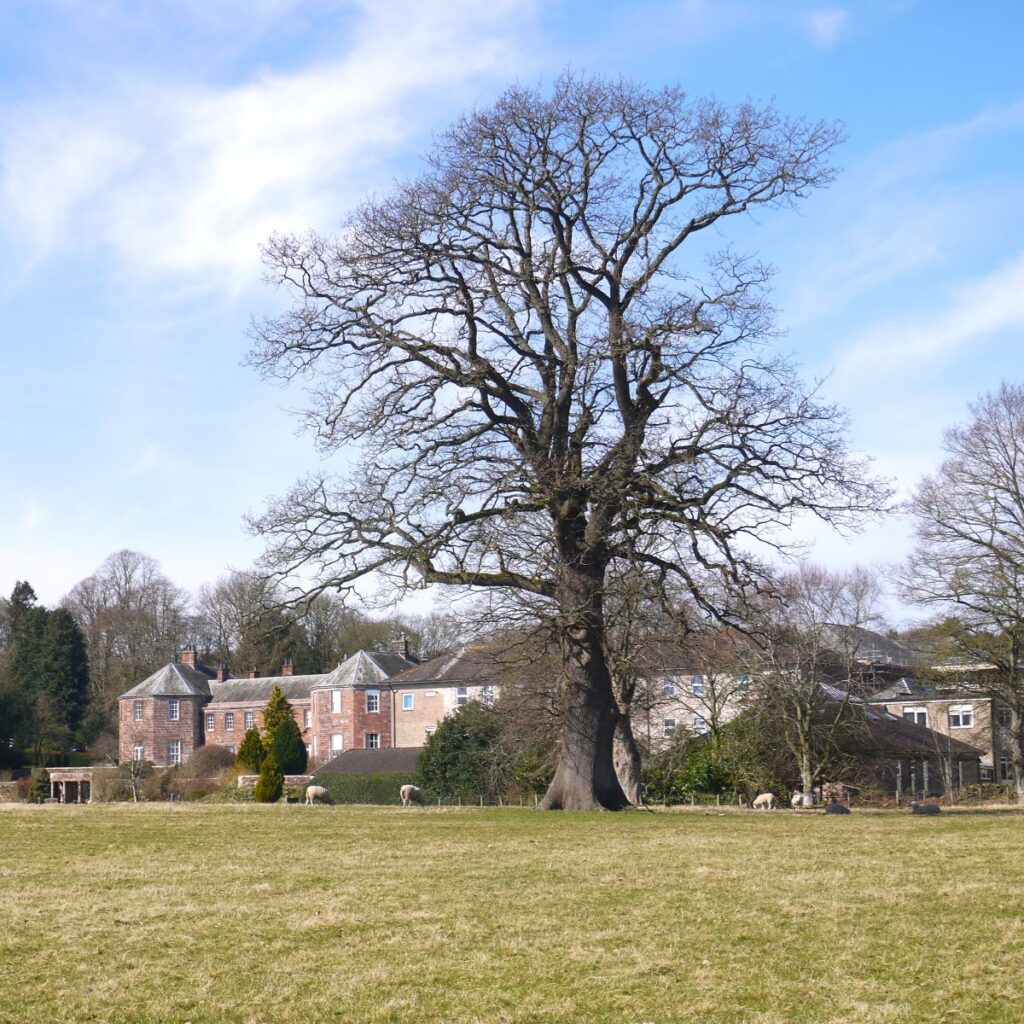
We continue over Lowther bridge and then bear left coming off the A6 to head up toward Brougham Hall. We approach this along the road walking under a bridge which connects the Chapel of St Wilfred with the main house.
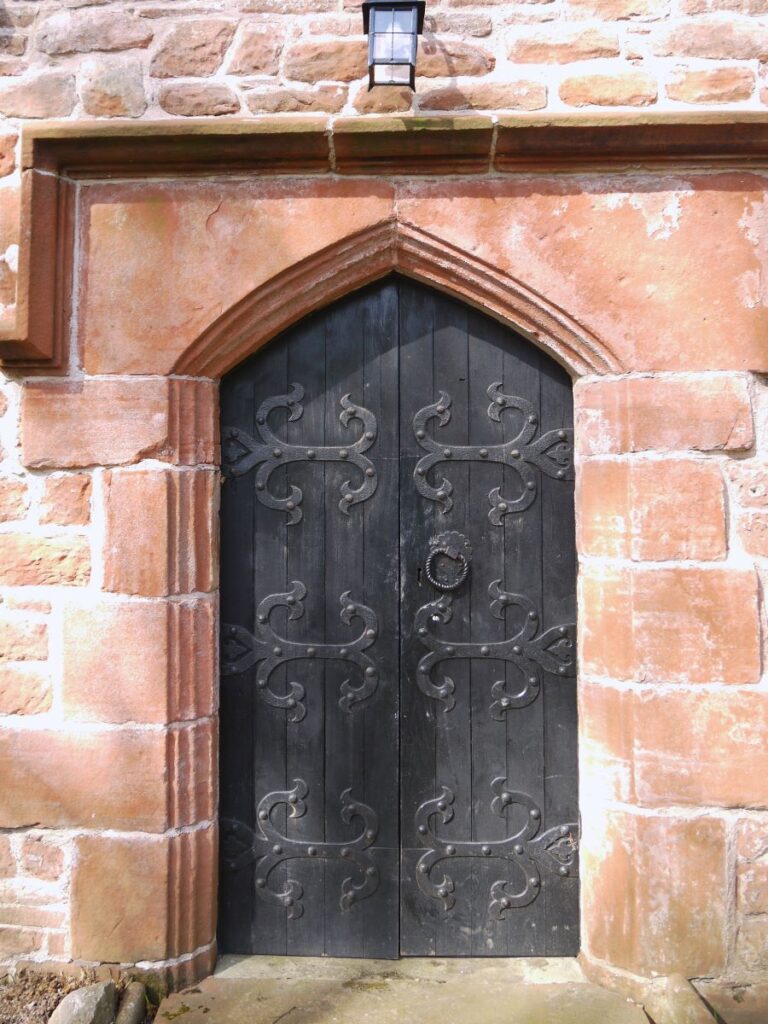
We will have a look at St Wilfrid’s soon, but first it is worth walking slightly further along the perimeter wall to the main door where we find the magnificent knocker pictured at the start.
Brougham Hall originally belonged to the de Burgham family who had held land at Brougham in Edward the Confessor’s time and were allowed to keep their position after the Norman Conquest of England, which occurred after 1092 in this region. Records show a Wilfred de Burgham living here in the reign of Henry II. The de Burghams retained land by military service to the Vieuxpont’s who lived at Brougham Castle.
The oldest part of the hall is the thirteenth-century gateway, followed by the Tudor Hall, which dates back to around 1480 – 1520. The seventeenth-century guardhouse was built by James Bird. The Hall was close to the scene of a bloody battle between the Jacobite army of Prince Charles Edward Stuart and Government forces (the Clifton Moor Skirmish), that took place in December 1745 – more on that later . . . this is a history walk after all.
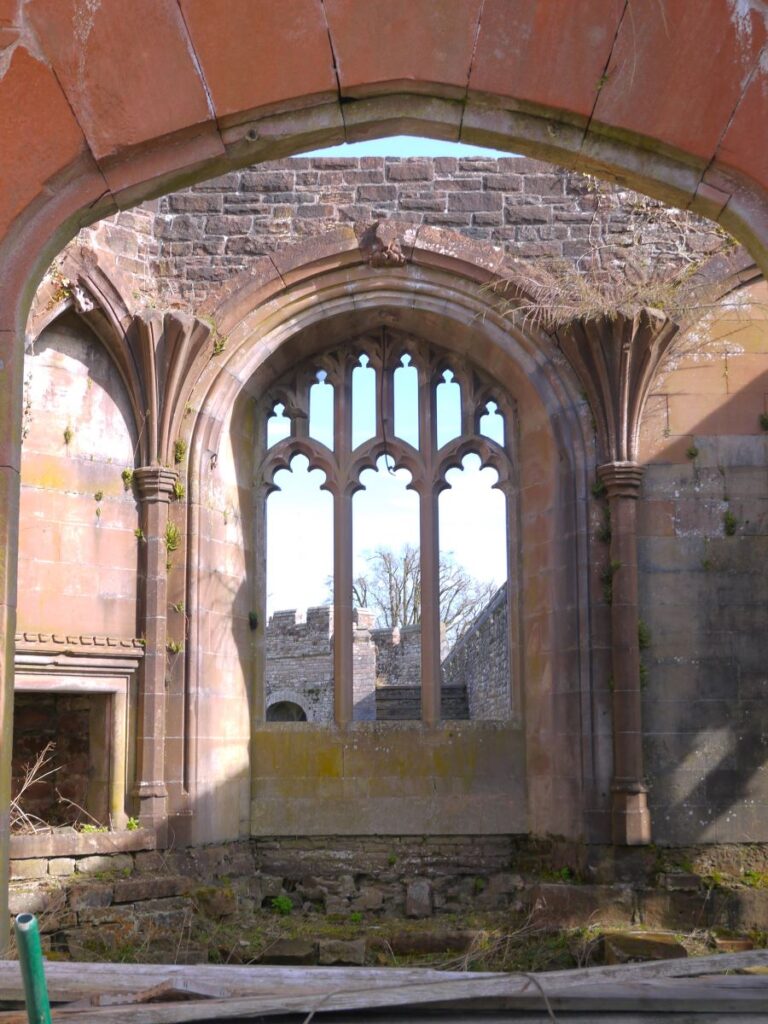
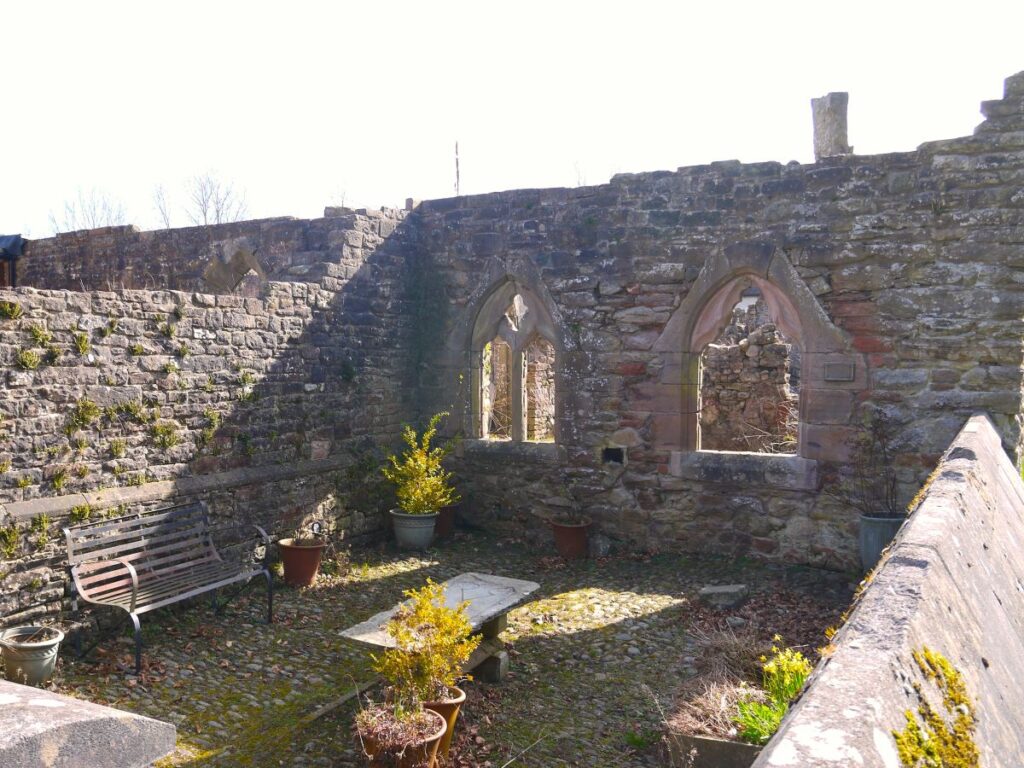
After having viewed the main door, we cross the road and approach the chapel of St Wilfred, a lovely red sandstone chapel that served the Hall. There has been a place of worship opposite Brougham Hall since at least 1310. The original Chapel was rebuilt by Lady Anne Clifford in 1659 and is one of four places of worship that were constructed during the Cromwellian Period. Visitors can enjoy walking round the beautiful churchyard, with the interior of the Chapel currently closed for restoration works.

The Chapel passed into the care of The Churches Conservation Trust (CCT) in April 2023 who have initiated a significant conservation and restoration program. Phase one of the work is now complete, with the chapel now drying out until spring 2025. Future phases of work include repairs to the windows, which include some rare medieval glass. This will be followed by replastering the walls with lime plaster, redecoration and the refitting of furniture. Due to the time needed for the building to dry out, work may not be completed until 2026 – the end date is flexible as quality and authenticity are more important than the calendar. Once completed though, the chapel will be regularly open to visitors and available to serve the community.

From the chapel, we cross the bridge to the main hall. The rise to power of Henry Brougham, 1st Baron Brougham and Vaux, led to the Hall being extended and enlarged between 1830 and 1847, using designs by the architect Lewis Nockalls Cottingham. From this point on, Brougham Hall received visits from prominent London society figures and other notable people, including royalty. This culminated in the visit, in 1905, of the King, Edward VII. However, after World War I, Brougham Hall, in common with many other country houses, faced a severe financial crisis. This was compounded by the spendthrift nature of Victor Brougham, 4th Baron Brougham and Vaux, and his failed attempts to shore up income by becoming a professional gambler – a strategy that rarely works. In order to clear the resulting family debts, the hall was sold in 1934. At this point the plan was for the hall to be demolished, but this did not happen immediately and then the second world war intervened.
From 1941 to 1945, there was a secret tank development facility at Brougham Hall. The project was known as Canal Defence Light (CDL). A plaque at the Hall remembers the men who worked there during the war. There is also a bunker which was used during World War II. This raises the obvious question – what use were tanks in defending canals? In fact, the word canal in this respect is part of a security measure – it was common for secret missions to have names that deliberately misled spies such that if conversations were overheard, the true nature of the work would remain secret.
It’s the word light that holds the real meaning here: the CDL project involved fitting tanks with high intensity lights that could be aimed at enemy artillery on the battle field. One or more CDL tank would target the enemy, using intense light that could be flashed using a shutter system, or coloured using glass filters. Where more than one CDL tank was available, they worked together to ensure that no part of the enemy artillery could diagnose where the light source was. In practice, the war came to an end before CDL could be deployed, and as far as is known, it was never used.


After World War II, the Hall languished in a derelict state until it was purchased by Christopher Terry in 1967. Mr. Terry and his wife, Alison, set about preventing further decline of the Hall, and today it is the subject of a renovation project by volunteers and is open to visitors throughout the year. Admission is free, and there is an honesty box to support the excellent work that is underway here: Please give generously.
Today the site is being slowly and sympathetically restored by a Community Interest Company (CIC), with signage at various locations around the hall explaining what they are doing. Income is also generated by renting retail units to local artisans, making the Hall even more interesting to visit.
Having spent a while at Brougham Hall, we set out for the second half of the walk. Although the route is free from hills, it is quite long, and we recognise that some will wish that the walk were shorter . . . and there are options here. As we leave the hall we turn right along the road. If you are short of time or energy simply follow this road (it’s very quiet) for 800m to get back to the cars. If you want even more history, turn right around the edge of the hall, and then first left looking for a fingerpost at a stile opposite. This takes us round the back of a number of houses and into Brougham Park.

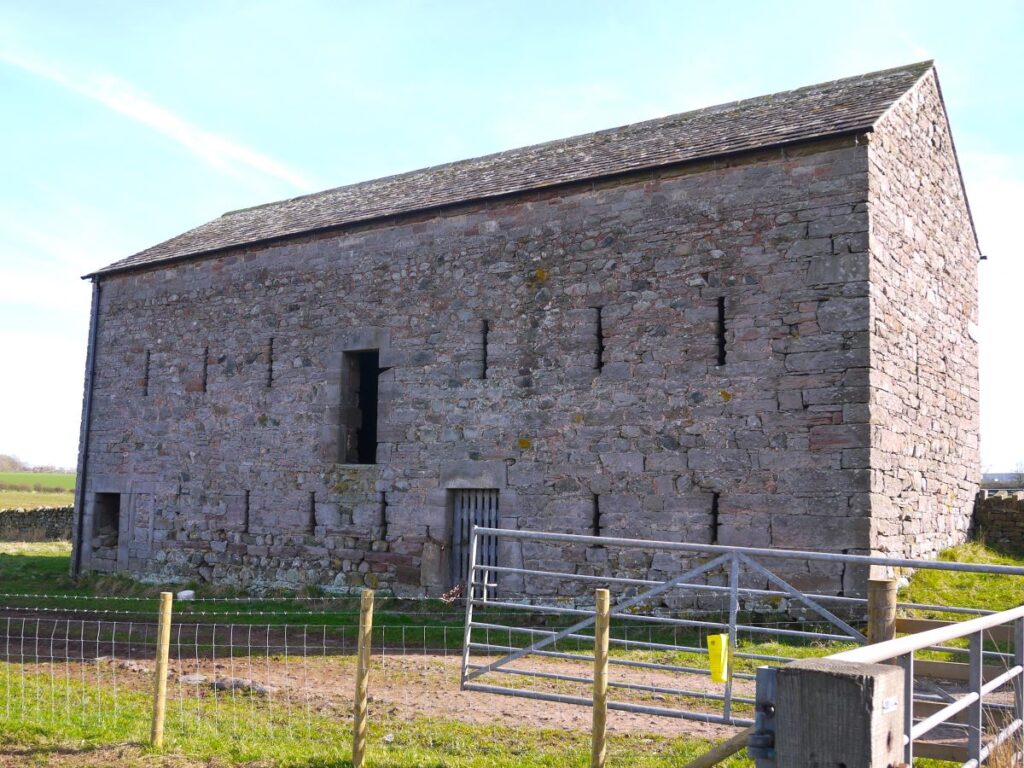
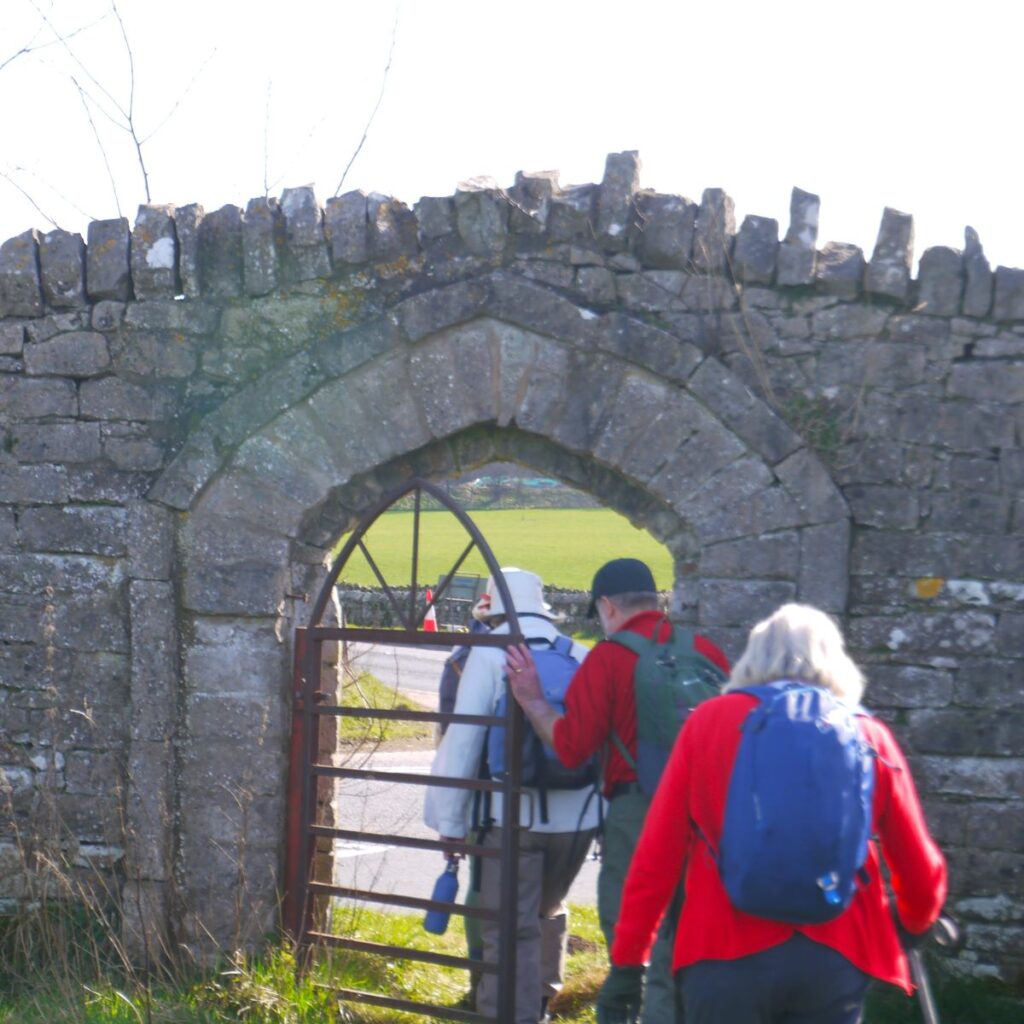
Our path runs round the back of the houses and then over a stile to continue along the tree line. As the trees come to an end we see an ornate gateway in the opposite wall, and we head there to exit the park onto the A6. We walk on the A6 pavement for 500m, passing an ancient barn and then seeing a sign that we are entering Clifton, the site of the last battle on English soil in 1745.
That battle was the Battle of Clifton Moor: it took place on the evening of Wednesday 18th December during the Jacobite rising of 1745.
Following the decision to retreat from Derby on 6th December, the fast-moving Jacobite army split into three smaller columns, and on the 18th, a small force of dragoons led by Cumberland and Sir Philip Honywood made contact with the Jacobite rearguard, at that point commanded by Lord George Murray. Murray ordered his baggage train to continue its retreat towards Penrith while he delayed Cumberland’s force. The action did not begin until late afternoon, in failing light and heavy rain – while technically a draw, it enabled Murray to retreat in good order and escape into Scotland.
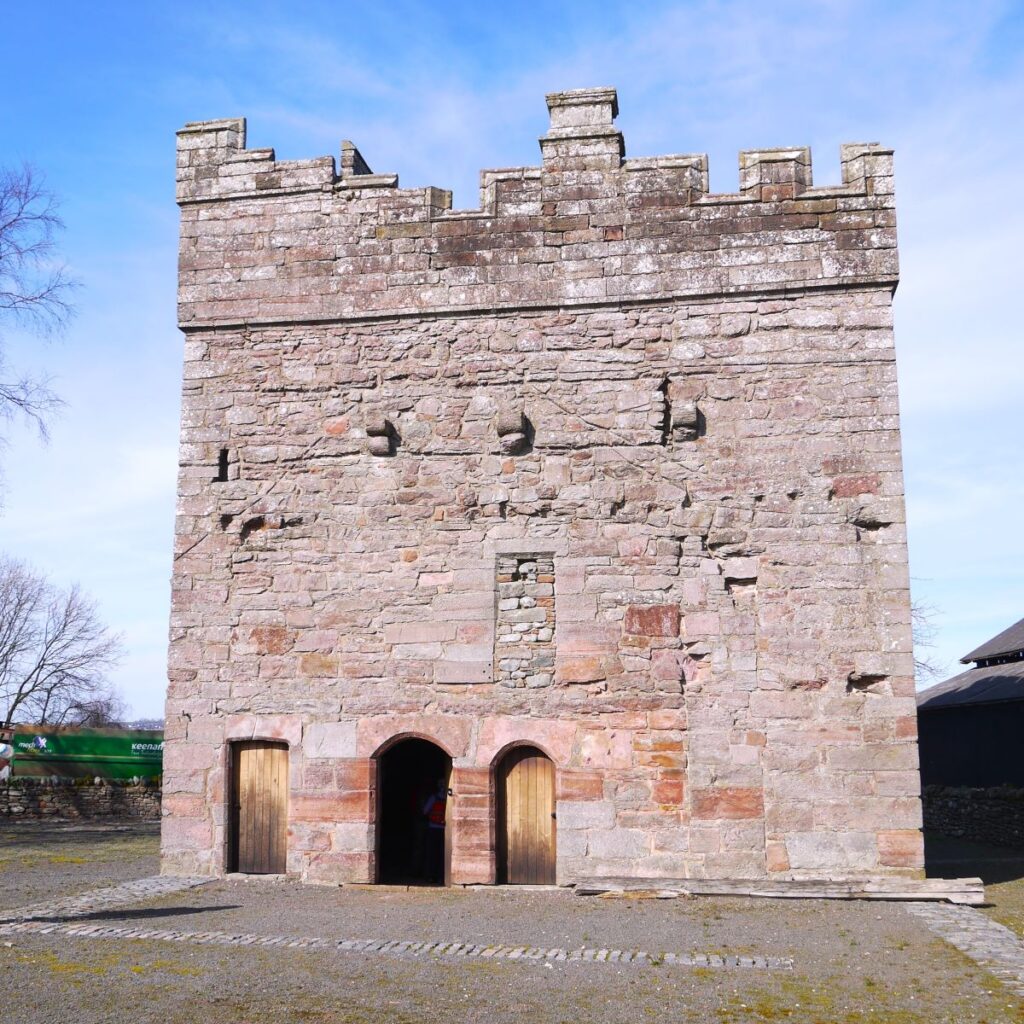
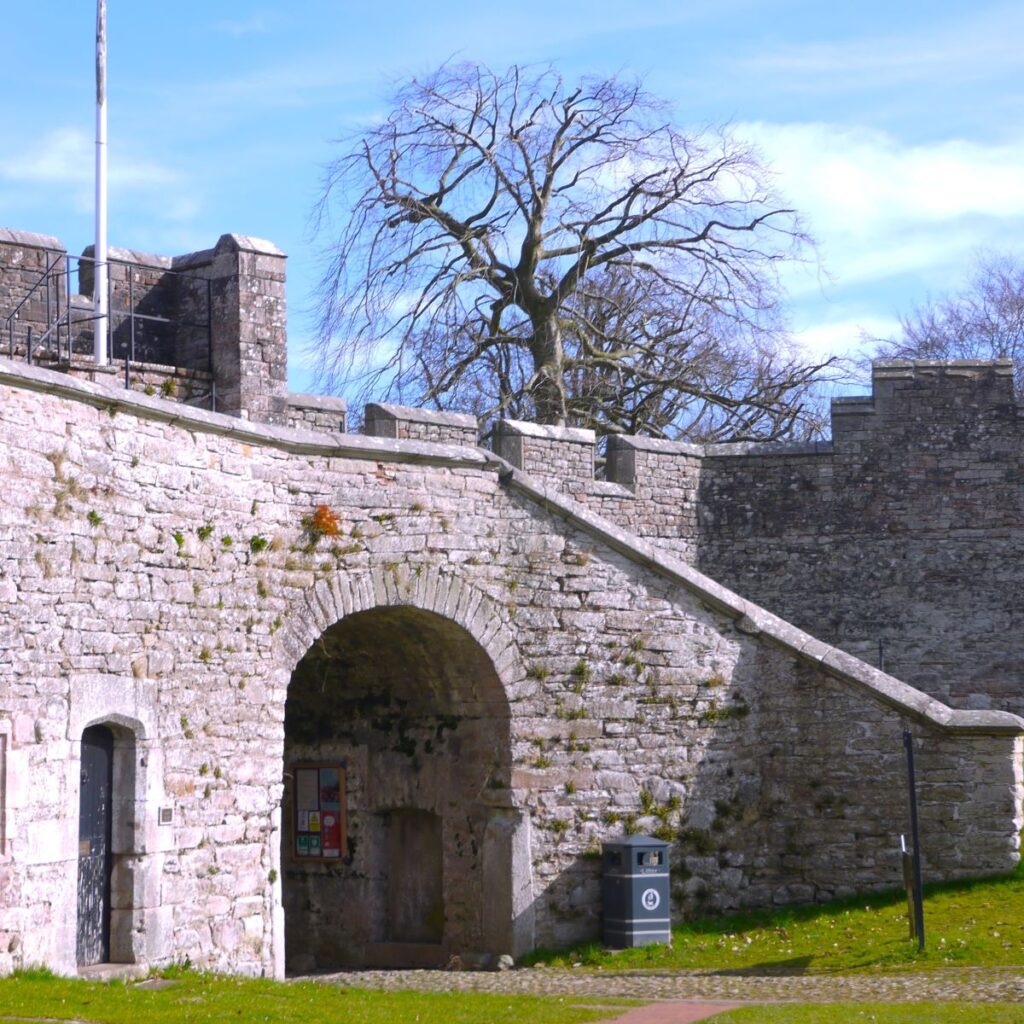
Given that the battle was an ugly skirmish in the rain that lasted just a few hours, it is not surprising that there is little evidence to see now. That is not to say however that Clifton lacks interest: As we approach the village, we see a prominent pele tower to the right and soon see a fingerpost directing us toward it. This is Clifton Hall.
The 15th century pele tower is all that remains of a much more substantial medieval manor house of Clifton Hall. Demolished in the early 19th century to make way for the current farmhouse, the hall was constructed in the late 14th century by the Engaine family.
Archaeology has revealed that this tower was not built until around 1475, at least a century after the original house. Like most pele towers it is a defensive structure, built when the border areas of England and Scotland were politically unsettled, and defence was of uppermost importance in building. However, Clifton does not have the massive walls and slit-like windows familiar in other pele towers – so its purpose may have been as much to demonstrate the status of its owners as to repel attackers.
It was used as a farm building until 1973 when the site was taken into the guardianship of the Department of the Environment, and since then sympathetic stabilisation and remediation works have taken place. Entry into the tower was originally via the principal chamber on the first floor, from a gallery or chamber over the hall or from an external staircase. That doorway is still visible, as is the outline of the manor house marked out on the ground in cobbles. Some while later, alterations were made and a door created at ground-floor level.
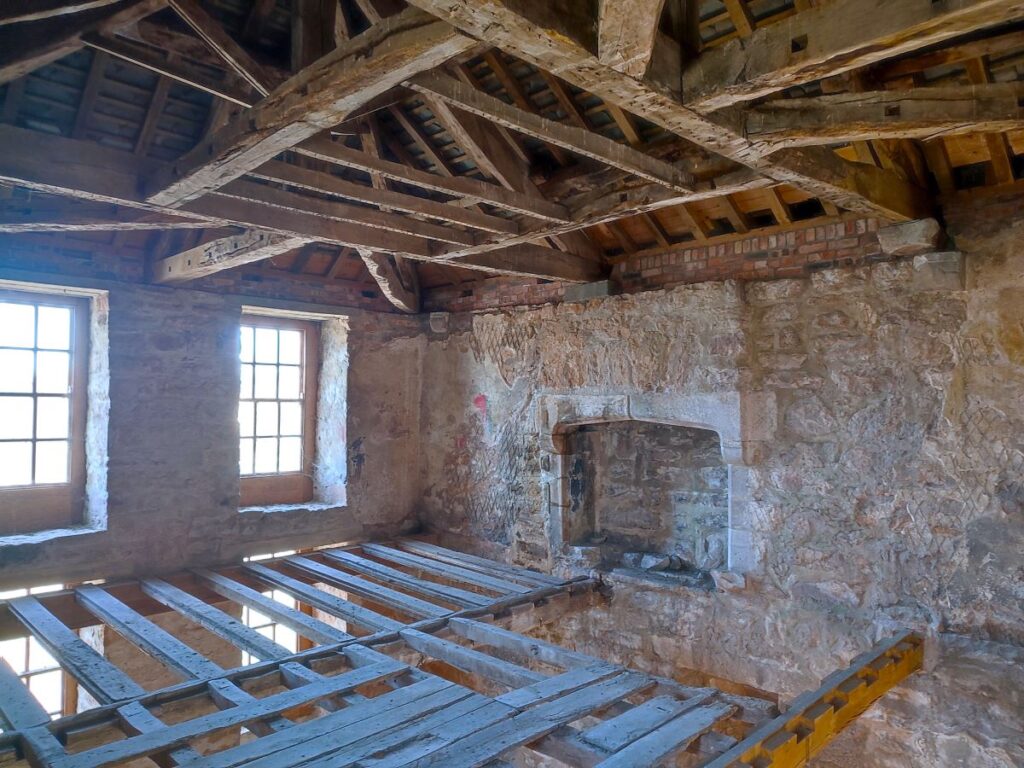
Used as a parlour in the 16th century, this ground-floor room was later subdivided and used as a kitchen and serving rooms. The fireplace in the north wall is original, as is the spice cupboard beside it that was recorded as having a decorated wooden door in the 19th century. The newel stair leads up to the first-floor chamber, where there is an impressive original fireplace and a small garderobe or latrine chamber. The top floor is the most private inner chamber, which was latterly used as sleeping quarters. All the ceilings were once decorated and panelled, and remnants of ornate painting on the remaining plaster suggest that the sleeping quarters would have been quite lavish.

Having spent some time at Clifton Hall we head back to the A6 and see the lovely church of St Cuthbert, dating from the 12th century
Tradition has it that the monks of Lindisfarne rested here with the body of St Cuthbert, when fleeing from Danish raiders in the 9th century.
The earliest part of the nave, and the south doorway, date from the 12th century. The chancel was rebuilt in the 13th century; north aisle built in the 14th century; chancel rebuilt, taken down and the stones replaced exactly, in 1846; an arch was inserted between the nave and the north aisle in the 1960s. So oddly for a Bentham Footpath Group walk, no contribution from E G Paley.
In 1943 a rat gnawed a gas pipe, and there was a violent explosion that blew all the glass out. Some of the early glass was rescued and put back. The church was not open for visitors at the time of our walk.
We continue along the A6 through the village, and cross the West Coast main line, before 100m later we see a way marker for a path on the left taking us up a lane, re-crossing the railway line, and then heading Northeast back toward Brougham. The GPX we recorded, viewable on the OS map on our website, shows us leaving the path and heading into a field here – this is an artifact created by poor GPX reception next to the high voltage lines of the railway – in reality the path is clear and stays on the farm track.
100m after the railway we meet a junction and go left and then immediately right – so heading in the same direction but now in an open field with the boundary to our right. We hold this direction for the next 500m walking through three fields – the last of which has camping facilities and eventually join a minor road at High Dykes.
We go right here and then just 50m later left onto an even smaller road. We could simply stay on this until we get back to Brougham Castle, but road walking is a little dull, so after 150m we take a signposted footpath on the left heading up an ancient green lane.

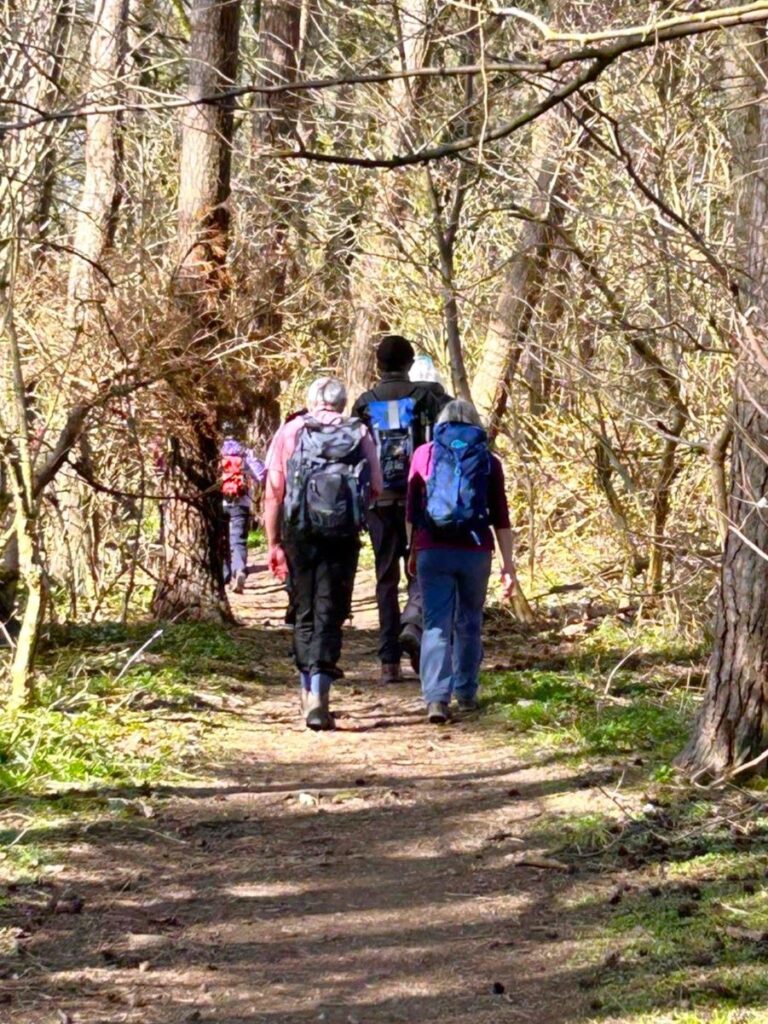
The first 400m of this path runs between pine trees, after which it arrives at a more open landscape where we see a farm ahead. We continue in the same direction (northwest) passing the farm, before taking a short left turn to arrive at a minor road. We head right at the road and pass Pembroke House, this was once part of a larger estate called the Hospital, having been given by the Countess of Pembroke to her Hospital of St Nicholas at Appleby.
We follow the road for a further 200m, catching glimpses of Brougham Hall over to the right, and realising that it’s only a short distance away, before we arrive at a road junction: Brougham Hall is to our left, but we head right and just 1km later find ourselves back at the cars.
Bentham Footpath Group walks are classified according to length and elevation change. This walk is “moderate” because it’s more than 12km long, but there are no difficult sections, and little change in elevation.